Thread Indicator Dial
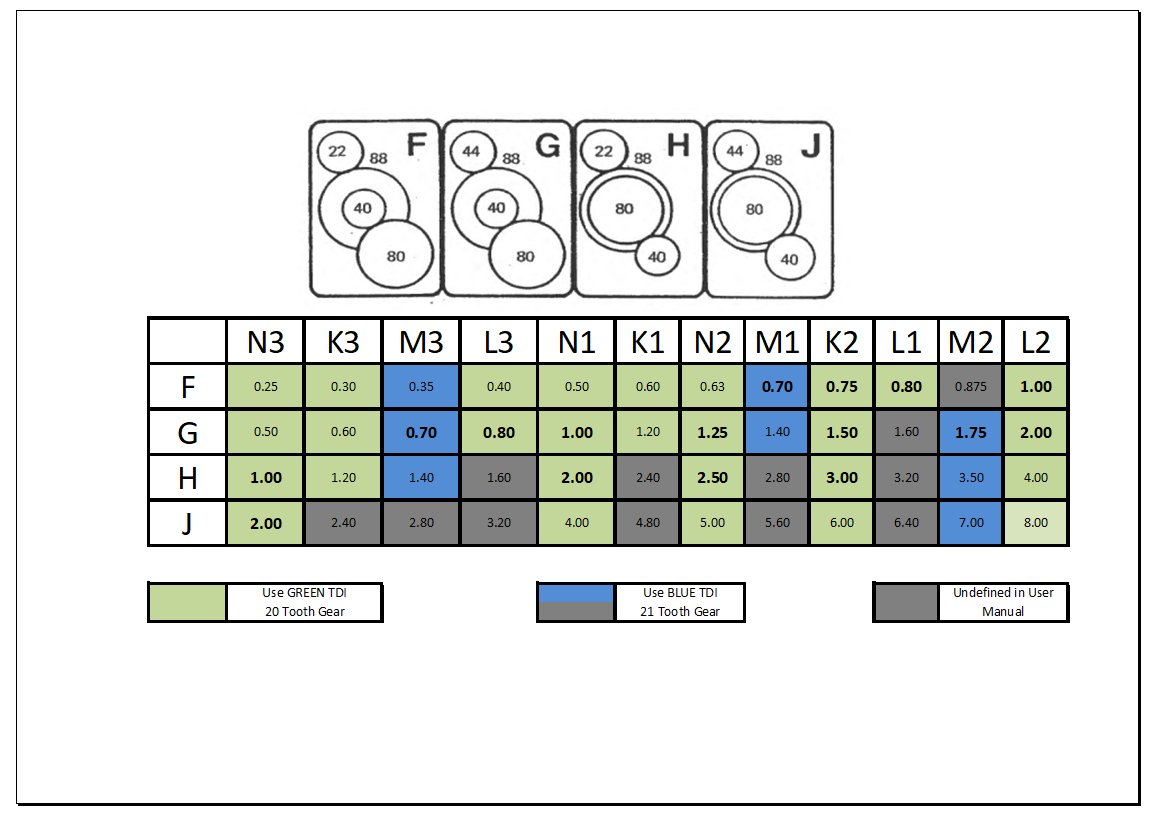
We have a custom designed 3D printed Thread Indicator Dial (TID). It is works exactly the same as the original manufacturers dial so the PDF of Harrison M250 Manual can be used as a reference. There are in fact two TIDs a Green one with a 20 tooth drive cog and a Blue one with a 21 tooth drive cog. Which one you use depends on the pitch of the thread you are wanting to cut, see table below.
The TID is normally not left fitted to the Lathe to reduce ware.
All design files for making the TIDs are available at https://www.thingiverse.com/thing:6566719
To fit the Thread Indicator Dial:-
- Ensure the metal bolt is screwed back in to the body of the TID
- Place the locating lug in the locating hole on the right hand side of the Carriage.
- Rotate the TID so as to bring the teeth of the cog to mesh with the Lead Screw.
- Now screw the bolt in to the threaded hole and tighten firmly with 6mm Allen key.
- Please remove the TID when you have finished using it.
Which Thread Indicator Dial to use:-
 It would appear that when using the M setting you need to use the BLUE TID with 21 tooth gear otherwise use the GREEN TID with 20 tooth gear


